Cara Install Plugin jQuery File Upload
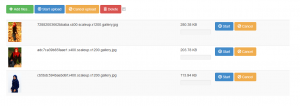
Di kesempatan kali ini saya akan memberikan tips dan trik mengenai Cara Install Plugin jQuery File Upload, dimana plugin ini dapat upload gambar sebanyak yang kita mau. Dan prosesnya pun telah amat bagus, seperti gambar di bawah ini ialah hasil dari plugin Jquery.
Nah dapat kalian lihat di gambar di atas ini ada beberapa tombol diantaranya ada Add Files, Start Upload, Start, Cancel dan Delete. Dan masing-masing tombol diatas telah berfungsi dengan bagus, inilah yang segala orang sering gunakan dengan plugin Jquery selain gampang di gunakan atau install nya. Lumayan kita kustom sedikit telah jadi hasil yang amat keren, plugin ini pun menghasilkan tampilan yang amat menarik dan tepat sasaran bagi pengodean sehinggga lebih cepat pula hasil yang di dapatkan. Bagus seketika saja kita mulai Cara Install Plugin jQuery File Upload teman-teman unduh terlebih dahulu plugin jQuery File Upload di https://github.com/blueimp/jQuery-File-Upload
Kemudian bikin folder upload dan pastekan file yang di unduh di pada nya lalu extract file hingga menghasilkan beberapa file
Kemudian buka file di url nya
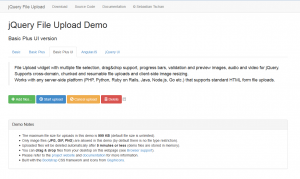
Karenanya akan menghasilkan seperti gambar di bawah ini
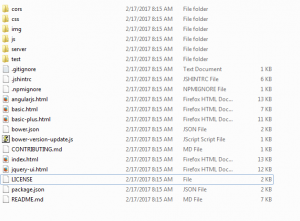
Langkah berikutnya hapus beberapa file yang terdapat di pada folder upload, dan sisakan file seperti gambar di bawah ini
Berikutnya kustom file index.html nya supaya menjadi tampilan seperti berikut ini
Atau teman-teman dapat copy script nya di bawah ini
<!DOCTYPE HTML>
<!--
/*
 * jQuery File Upload Plugin Demo
 * https://github.com/blueimp/jQuery-File-Upload
 *
 * Copyright 2010, Sebastian Tschan
 * https://blueimp.net
 *
 * Licensed under the MIT license:
 * https://opensource.org/licenses/MIT
 */
-->
<html lang=en>
<head>
<!-- Force latest IE rendering engine or ChromeFrame if installed -->
<!--[if IE]>
<meta http-equiv=X-UA-Compatible content=IE=edge,chrome=1>
<![endif]-->
<meta charset=utf-8>
<title>jQuery File Upload Demo</title>

<meta name=description content=File Upload widget with multiple file selection, dragamp;drop support, progress bars, validation and preview images, audio and video for jQuery. Supports cross-domain, chunked and resumable file uploads and client-side image resizing. Works with any server-side platform (PHP, Python, Ruby on Rails, Java, Node.js, Go etc.) that supports standard HTML form file uploads.>
<meta name=viewport content=width=device-width, initial-scale=1.0>
<!-- Bootstrap styles -->
<link rel=stylesheet href=//netdna.bootstrapcdn.com/bootstrap/3.2.0/css/bootstrap.min.css>
<!-- Generic page styles -->
<link rel=stylesheet href=css/style.css>
<!-- blueimp Gallery styles -->
<link rel=stylesheet href=//blueimp.github.io/Gallery/css/blueimp-gallery.min.css>
<!-- CSS to style the file input field as button and adjust the Bootstrap progress bars -->
<link rel=stylesheet href=css/jquery.fileupload.css>
<link rel=stylesheet href=css/jquery.fileupload-ui.css>
<!-- CSS adjustments for browsers with JavaScript disabled -->
<noscript><link rel=stylesheet href=css/jquery.fileupload-noscript.css></noscript>
<noscript><link rel=stylesheet href=css/jquery.fileupload-ui-noscript.css></noscript>
</head>
<body>

<div class=container>
    <div class=row>
        <div class=col-md-12>
            <!-- The file upload form used as target for the file upload widget -->
            <form id=fileupload action=//jquery-file-upload.appspot.com/ method=POST enctype=multipart/form-data>
                <!-- Redirect browsers with JavaScript disabled to the origin page -->
                <noscript><input type=hidden name=redirect value=https://blueimp.github.io/jQuery-File-Upload/></noscript>
                <!-- The fileupload-buttonbar contains buttons to add/delete files and start/cancel the upload -->
                <div class=row fileupload-buttonbar>
                    <div class=col-lg-7>
                        <!-- The fileinput-button span is used to style the file input field as button -->
                        <span class=btn btn-success fileinput-button>
                            <i class=glyphicon glyphicon-plus></i>
                            <span>Add files...</span>
                            <input type=file name=files[] multiple>
                        </span>
                        <button type=submit class=btn btn-primary start>
                            <i class=glyphicon glyphicon-upload></i>
                            <span>Start upload</span>
                        </button>
                        <button type=reset class=btn btn-warning cancel>
                            <i class=glyphicon glyphicon-ban-circle></i>
                            <span>Cancel upload</span>
                        </button>
                        <button type=button class=btn btn-danger delete>
                            <i class=glyphicon glyphicon-trash></i>
                            <span>Delete</span>
                        </button>
                        <input type=checkbox class=toggle>
                        <!-- The global file processing state -->
                        <span class=fileupload-process></span>
                    </div>
                    <!-- The global progress state -->
                    <div class=col-lg-5 fileupload-progress fade>
                        <!-- The global progress bar -->
                        <div class=progress progress-striped active role=progressbar aria-valuemin=0 aria-valuemax=100>
                            <div class=progress-bar progress-bar-success style=width:0%;></div>
                        </div>
                        <!-- The extended global progress state -->
                        <div class=progress-extended>nbsp;</div>
                    </div>
                </div>
                <!-- The table listing the files available for upload/unduh -->
                <table role=presentation class=table table-striped><tbody class=files></tbody></table>
            </form>
        </div>
    </div>
</div>
<!-- The tema to display files available for upload -->
<script id=template-upload type=text/x-tmpl>
{% for (var i=0, file; file=o.files[i]; i++) { %}
    <tr class=template-upload fade>
        <td>
            <span class=preview></span>
        </td>
        <td>
            <p class=name>{%=file.name%}</p>
            <strong class=error text-danger></strong>
        </td>
        <td>
            <p class=size>Processing...</p>
            <div class=progress progress-striped active role=progressbar aria-valuemin=0 aria-valuemax=100 aria-valuenow=0><div class=progress-bar progress-bar-success style=width:0%;></div></div>
        </td>
        <td>
            {% if (!i  !o.options.autoUpload) { %}
                <button class=btn btn-primary start disabled>
                    <i class=glyphicon glyphicon-upload></i>
                    <span>Start</span>
                </button>
            {% } %}
            {% if (!i) { %}
                <button class=btn btn-warning cancel>
                    <i class=glyphicon glyphicon-ban-circle></i>
                    <span>Cancel</span>
                </button>
            {% } %}
        </td>
    </tr>
{% } %}
</script>
<!-- The tema to display files available for unduh -->
<script id=template-download type=text/x-tmpl>
{% for (var i=0, file; file=o.files[i]; i++) { %}
    <tr class=template-download fade>
        <td>
            <span class=preview>
                {% if (file.thumbnailUrl) { %}
                    <a href={%=file.url%} title=Cara Install Plugin jQuery File Upload unduh={%=file.name%} data-gallery><img src={%=file.thumbnailUrl%}></a>
                {% } %}
            </span>
        </td>
        <td>
            <p class=name>
                {% if (file.url) { %}
                    <a href={%=file.url%} title=Cara Install Plugin jQuery File Upload unduh={%=file.name%} {%=file.thumbnailUrl?'data-gallery':''%}>{%=file.name%}</a>
                {% } else { %}
                    <span>{%=file.name%}</span>
                {% } %}
            </p>
            {% if (file.error) { %}
                <div><span class=label label-danger>Error</span> {%=file.error%}</div>
            {% } %}
        </td>
        <td>
            <span class=size>{%=o.formatFileSize(file.size)%}</span>
        </td>
        <td>
            {% if (file.deleteUrl) { %}
                <button class=btn btn-danger delete data-type={%=file.deleteType%} data-url={%=file.deleteUrl%}{% if (file.deleteWithCredentials) { %} data-xhr-fields='{withCredentials:true}'{% } %}>
                    <i class=glyphicon glyphicon-trash></i>
                    <span>Delete</span>
                </button>
                <input type=checkbox name=delete value=1 class=toggle>
            {% } else { %}
                <button class=btn btn-warning cancel>
                    <i class=glyphicon glyphicon-ban-circle></i>
                    <span>Cancel</span>
                </button>
            {% } %}
        </td>
    </tr>
{% } %}
</script>
<script src=http://ajax.googleapis.com/ajax/libs/jquery/1.11.3/jquery.min.js></script>
<!-- The jQuery UI widget factory, can be omitted if jQuery UI is already included -->
<script src=js/vendor/jquery.ui.widget.js></script>
<!-- The Templates plugin is included to render the upload/unduh listings -->
<script src=http://blueimp.github.io/JavaScript-Templates/js/tmpl.min.js></script>
<!-- The Load Image plugin is included for the preview images and image resizing functionality -->
<script src=http://blueimp.github.io/JavaScript-Load-Image/js/load-image.all.min.js></script>
<!-- The Canvas to Blob plugin is included for image resizing functionality -->
<script src=http://blueimp.github.io/JavaScript-Canvas-to-Blob/js/canvas-to-blob.min.js></script>
<!-- Bootstrap JS is not required, but included for the memiliki tampilan yang dinamis demo navigation -->
<script src=http://netdna.bootstrapcdn.com/bootstrap/3.2.0/js/bootstrap.min.js></script>
<!-- blueimp Gallery script -->
<script src=http://blueimp.github.io/Gallery/js/jquery.blueimp-gallery.min.js></script>
<!-- The Iframe Transport is required for browsers without support for XHR file uploads -->
<script src=js/jquery.iframe-transport.js></script>
<!-- The basic File Upload plugin -->
<script src=js/jquery.fileupload.js></script>
<!-- The File Upload processing plugin -->
<script src=js/jquery.fileupload-process.js></script>
<!-- The File Upload image preview  resize plugin -->
<script src=js/jquery.fileupload-image.js></script>
<!-- The File Upload audio preview plugin -->
<script src=js/jquery.fileupload-audio.js></script>
<!-- The File Upload video preview plugin -->
<script src=js/jquery.fileupload-video.js></script>
<!-- The File Upload validation plugin -->
<script src=js/jquery.fileupload-validate.js></script>
<!-- The File Upload user interface plugin -->
<script src=js/jquery.fileupload-ui.js></script>
<!-- The main application script -->
<script src=js/main.js></script>
<!-- The XDomainRequest Transport is included for cross-domain file deletion for IE 8 and IE 9 -->
<!--[if (gte IE 8)(lt IE 10)]>
<script src=js/cors/jquery.xdr-transport.js></script>
<![endif]-->
</body>
</html>
Dan file di pada index.html hapus dan di gantikan dengan script di atas ini, karenanya hasilnya seperti di bawah ini
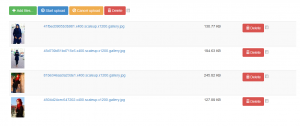
Kemudian kita akan coba upload file
Nah seperti yang teman-teman lihat di gambar di atas ini, gambar telah berhasil di upload dan ketika kita cek pada folder server/php/files gambar masuk di pada folder files
Amat gampang bukan, bagus sekianlah dulu di tips dan trik kali ini mengenai Cara Install Plugin jQuery File Upload. Kita berjumpa lagi di artikel berikutnya, terimakasih dan hingga jumpa.
Semoga bermanfaat
Sumber https://kursuswebsite.org


